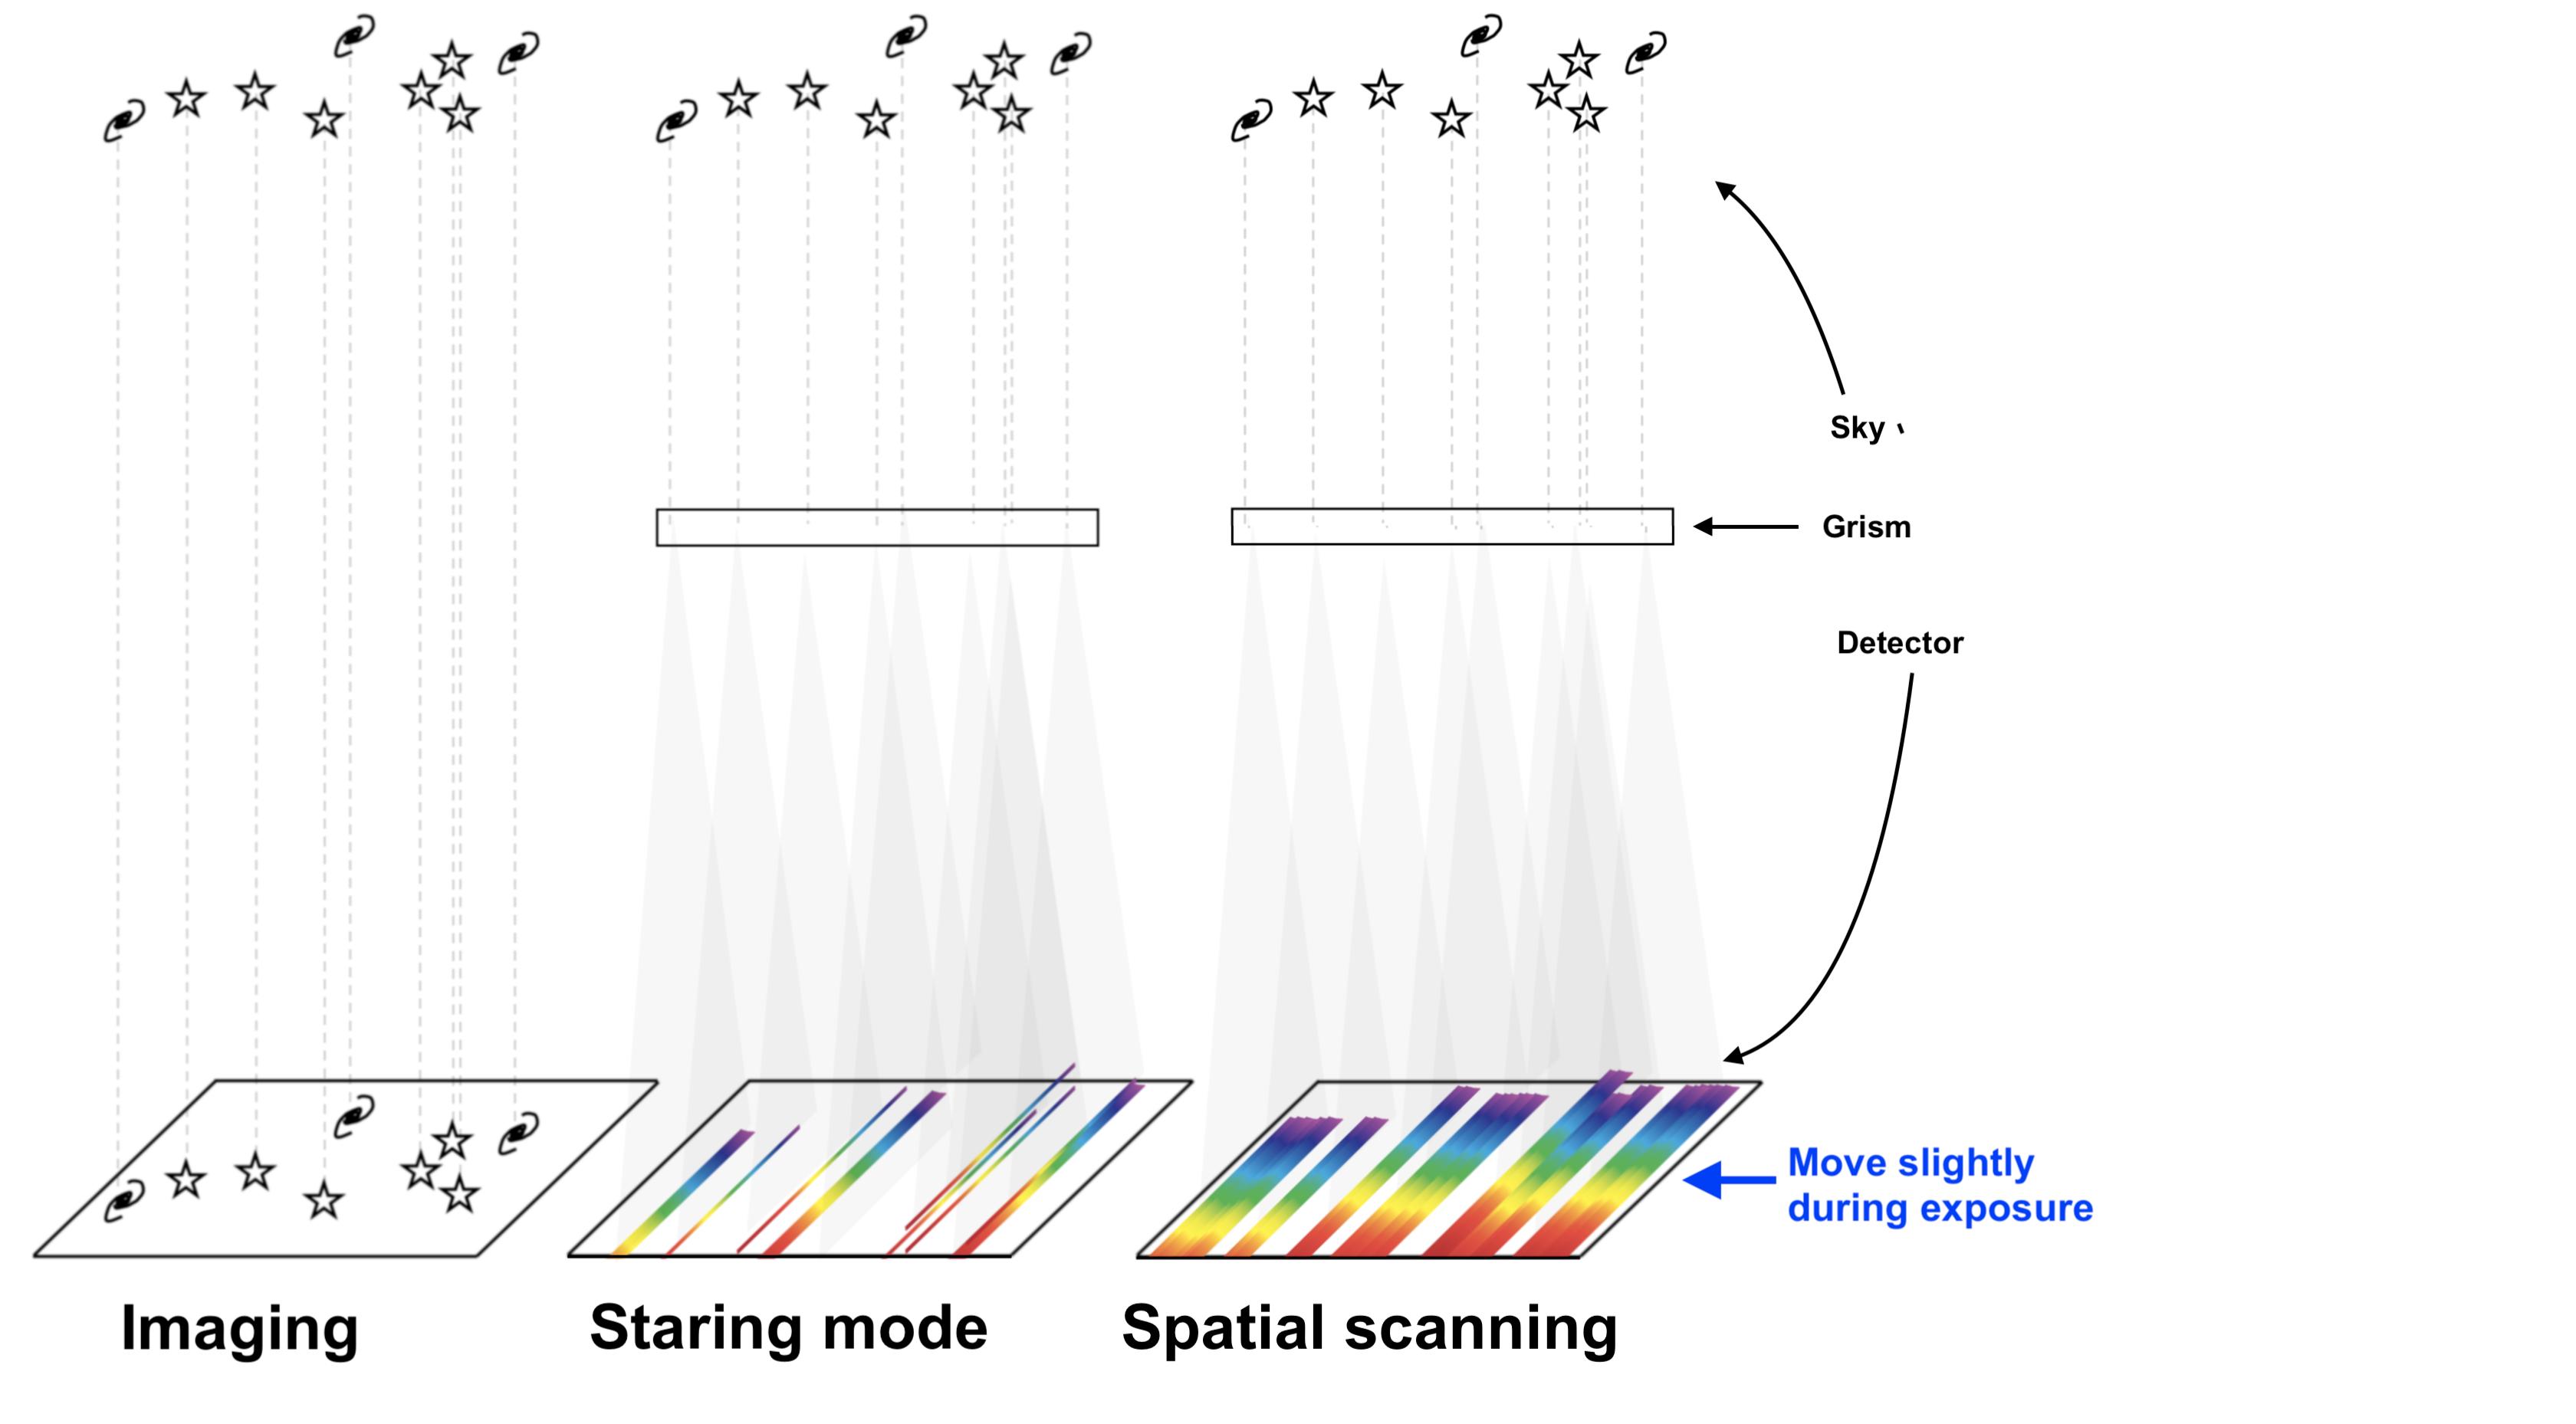
"Staring mode" is the traditional way of simply pointing the telescope and exposing the detector.
In "spatial scanning mode", you slowly move the telescope, so that the image is slightly smeared out in the spatial direction.
The figure below shows the principle: On the left is how a regular image is taken; in the middle, a regular spectrum is taken in staring mode, and in the right panel, the detector is moved during the exposure, resulting in the spatial scanning mode. The farther you scan spatially, the brighter and object you may observe before over-exposing, but the downside is that more objects will start to overlap, ruining the spectra.

Left panel: "Imaging"; each observed object shows up on the detector at its corresponding position on the sky.
Middle panel: "Staring mode"; when a grism (sort of like a prism) is inserted, the light from each object is spread out according to its wavelength, producing a spectrum.
Right panel: "Scanning mode"; if the detector is moved slightly during exposure, the spectra are spread out perpendicular to the wavelength direction, effective using a larger number of pixel to collect the photons in. However, if the detector is moved too much, the spectra begin to blend.
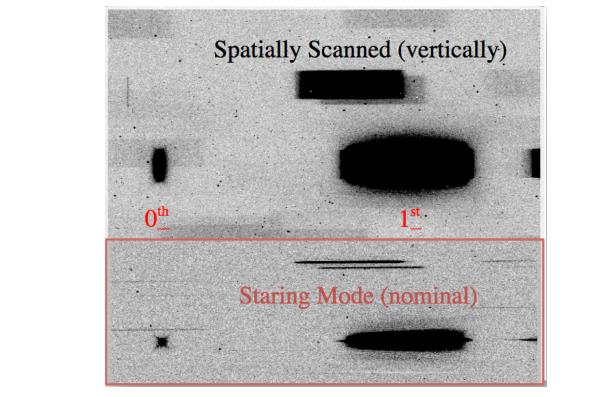
This picture, from HST's WFC3 handbook shows the difference in a real observation: It's quite small, but particularly for the "$0^\mathrm{th}$ object" (on the left) you can see that in the staring mode it's over-exposed, creating diagonal spikes, which are reduced in spatial scanning mode:

In the picture, the objects are located in the vertical direction, while their spectra are dispersed in the horisontal direction. You can see that in the spatial scanning mode, the objects are slightly broader vertically.
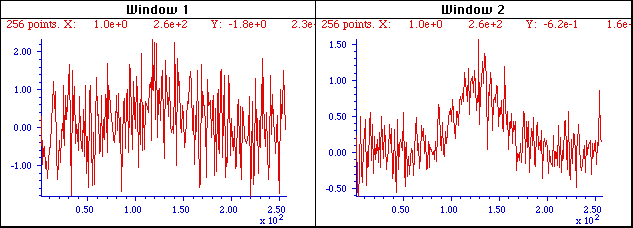
The advantage of the scanning mode is that you can expose for a longer time, without the detector getting saturated (which can be a problem for bright stars). When you expose for longer, you collect more photons and hence obtain a higher signal-to-noise ratio (S/N), meaning that your observation becomes more "accurate". The figure below (from these notes) shows the advantage of a high S/N:

Two spectra of the same object, with the right having been exposed 9 times longer than the left, resulting in a $\sqrt{9}=3$ times higher S/N. Determining for instance the central wavelength of this spectral line becomes much more accurate with higher S/N.
Note that both modes refer to so-caled slitless spectroscopy. A way to avoid the spectra to overlap is to insert a "slit" which allows only the light from a narrow (of the order of an arcsecond) part of the sky to be observed. In that way you will only obtain spectra of objects lying exactly along the slit, but in return you will have a "cleaner" spectrum.
Note also that you can obtain the same effect by dividing your observation into multiple staring mode exposures and then add them together. Scanning mode is a more practical way of not having to do this.


